Introduction
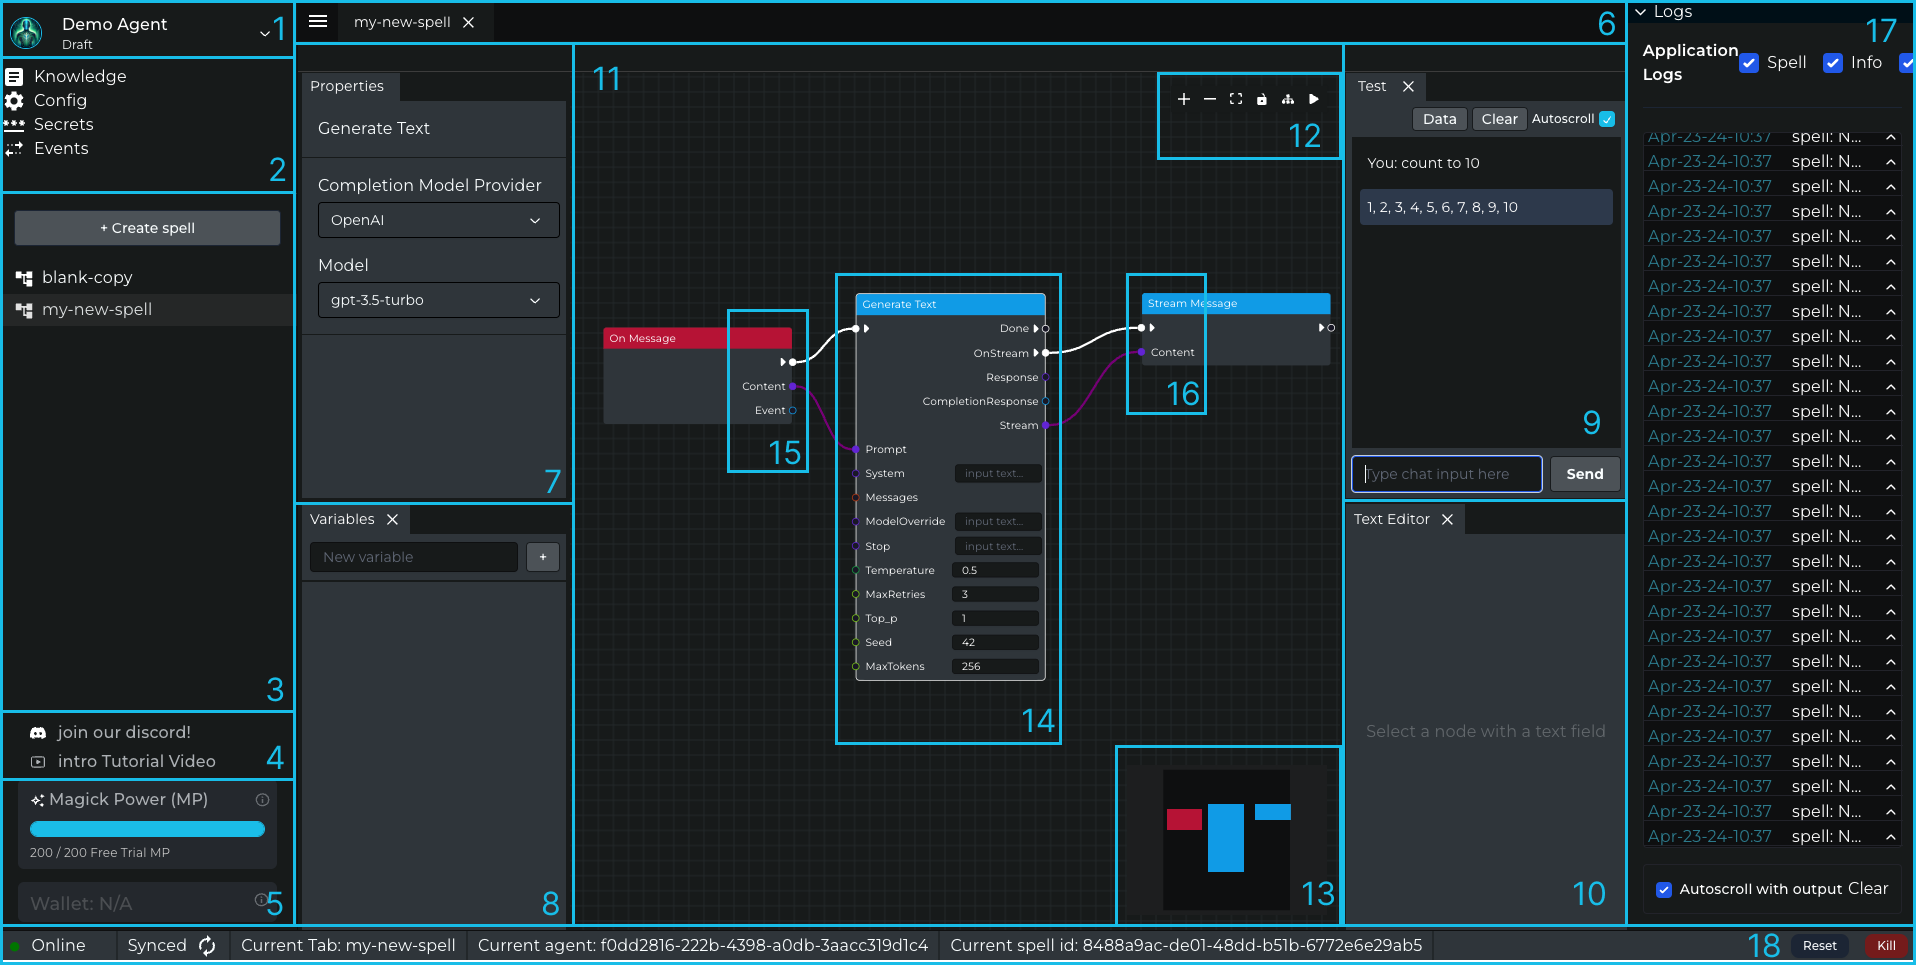
The Magick AIDE (AI Integrated Development Environment) is a powerful visual programming environment for creating AI agents. Let's take a closer look at its main sections and functionalities.
Sidebar (1, 2, 3, 4, 5)#
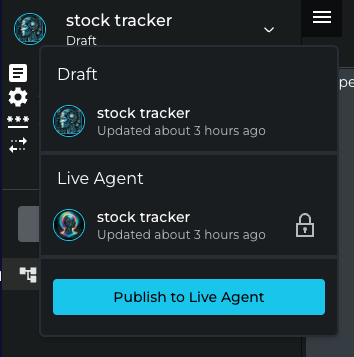
Agent Selector (1)#
The Agent Selector allows you to switch between different agents you have access to within the AIDE. You currently have one live agent and a draft agent. The live agent is the one that is currently deployed and running, while the draft agent is the one you are currently working on.
Config Tabs (2)#
This section contains tabs for managing different aspects of your agent including knowledge, embedding models, and link secrets to your Agent.
Knowledge#
This tab allows you to manage any knowledge you want your agent to have access too as well as any knowledge it has aquired during a given spell run.
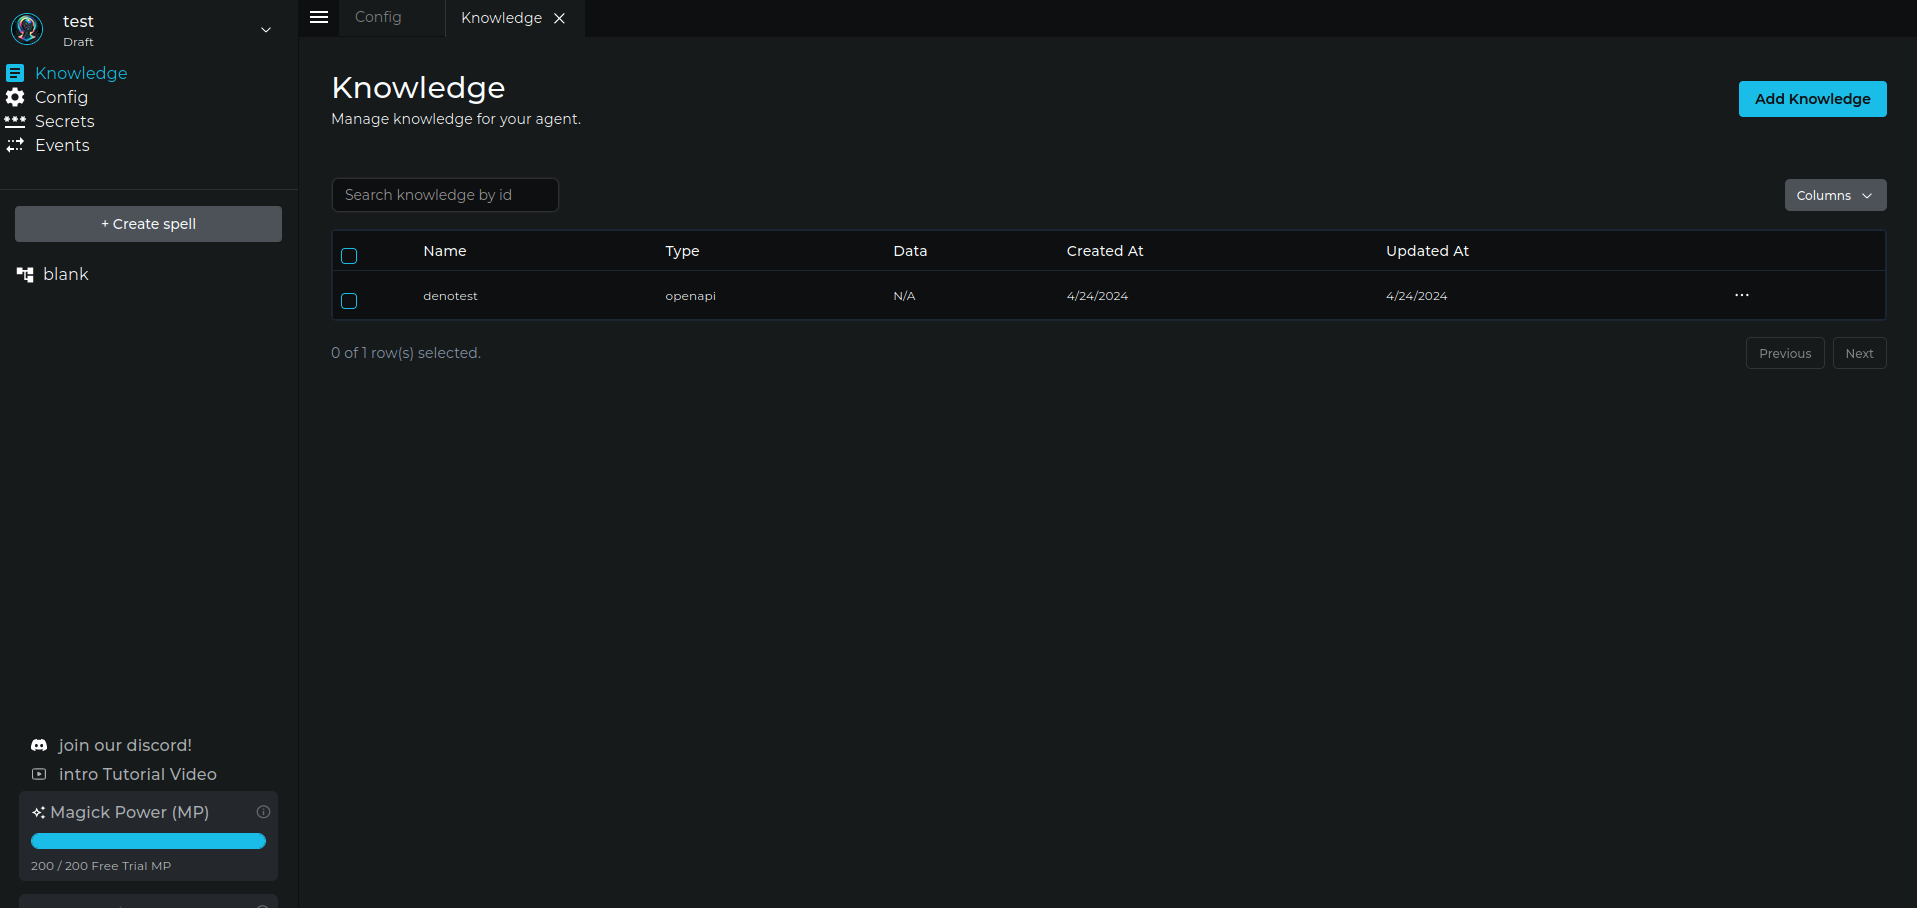
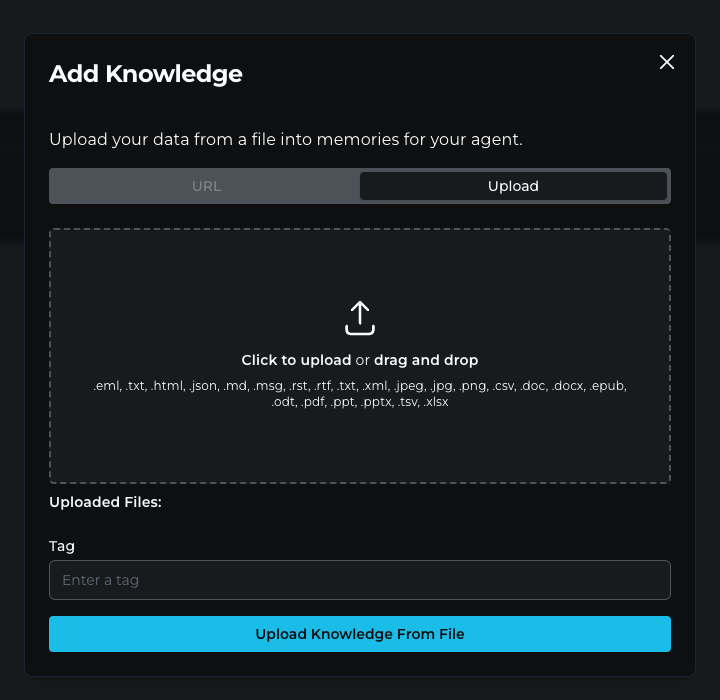
You can upload knowledge in a variety of formats including text, images, documents and csv files and more. You can also add knowledge from the web using a url.
Config#
Here, you can configure various settings and parameters for your agent including:
- Embedding Model & Provider (required for using embedding models in your spell).
- Linking secrets (API keys, credentials, etc.) to your agent to use in your spells and connect to external services.

The Core secrets view shows the currently supported models by Magick and the ability to link secrets to them.

The Plugin secrets view shows the currently supported plugins by Magick as well as any other plugins that you might have added to magick and the ability to link secrets to them.
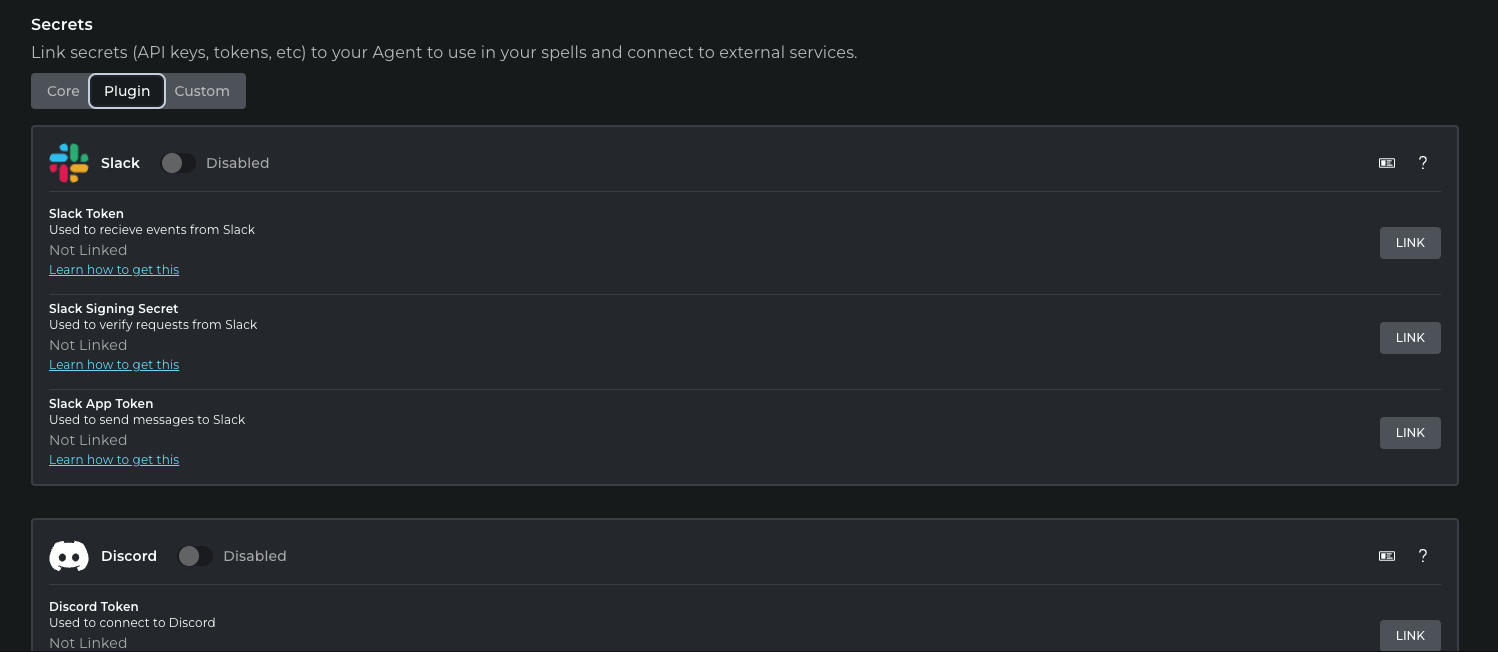
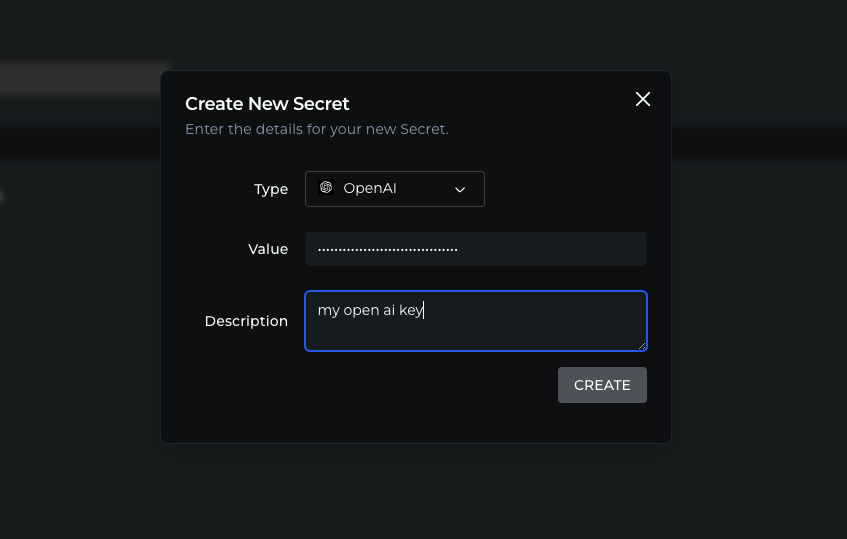
Secrets#
This tab is used to manage sensitive information, such as API keys or credentials, securely within the AIDE.
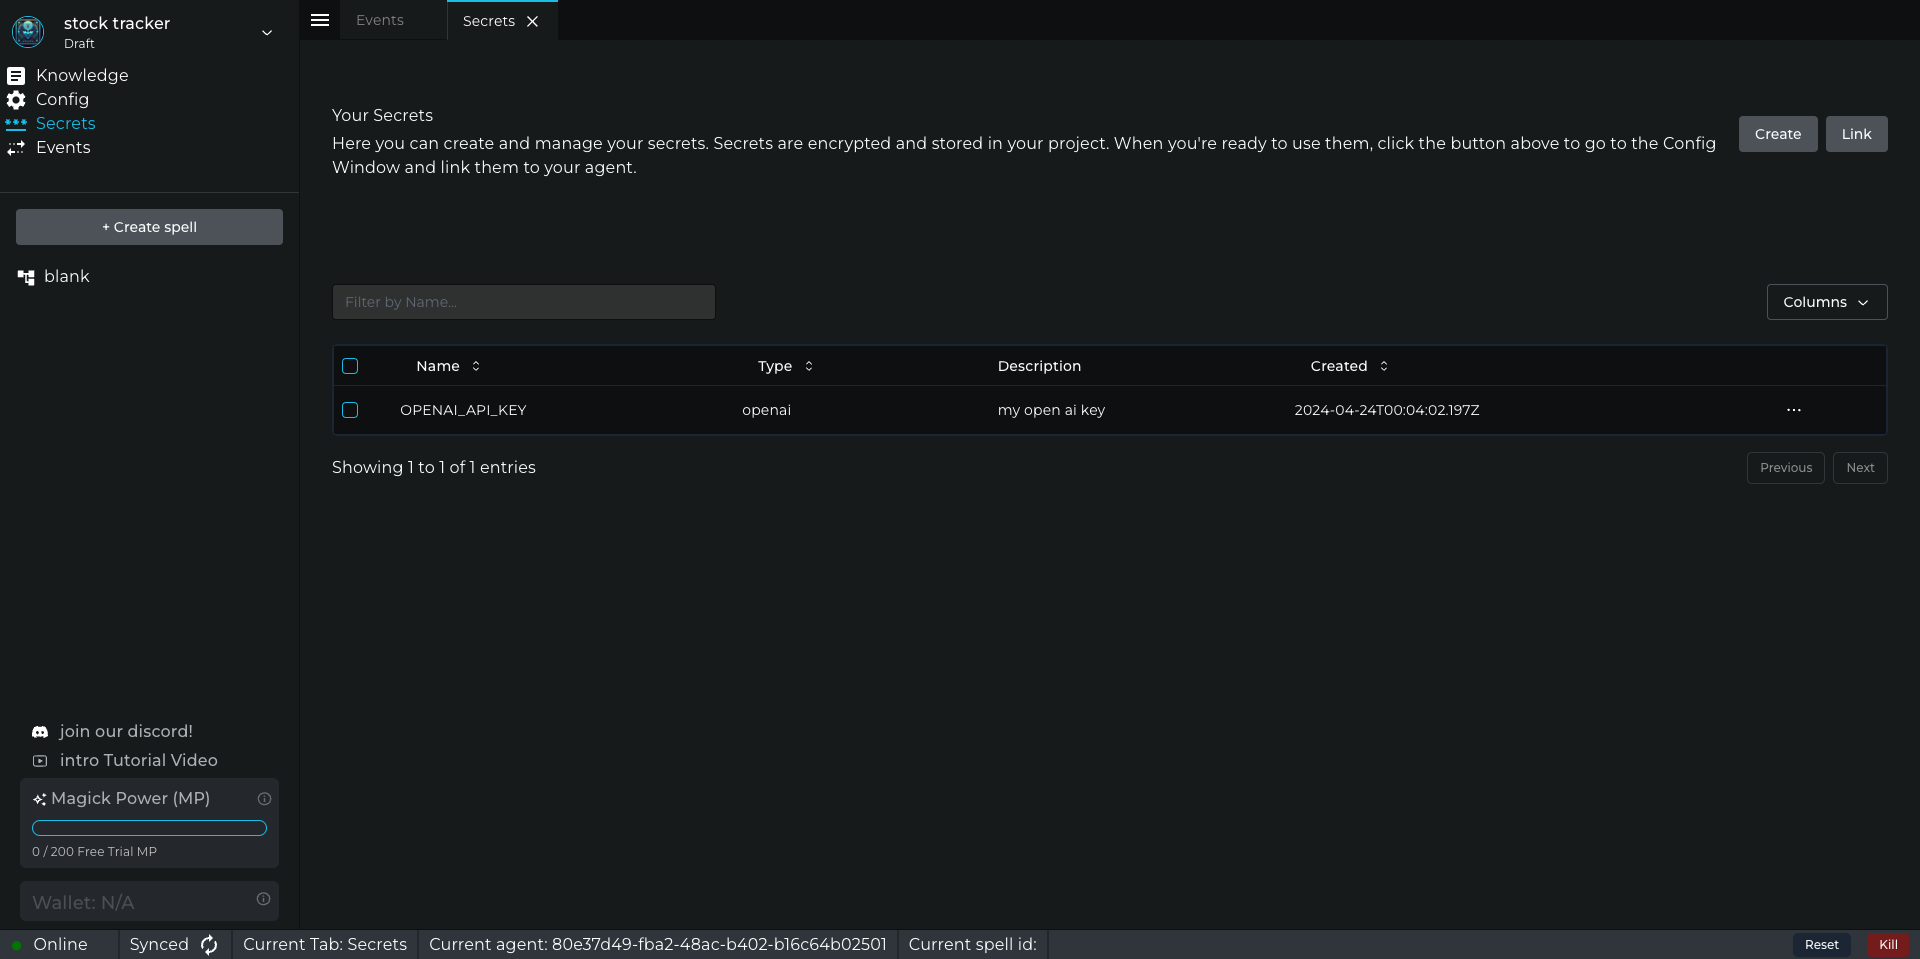
Once you click on the create button you will be able to choose the type of secret you want to create and then fill in the details of the secret.
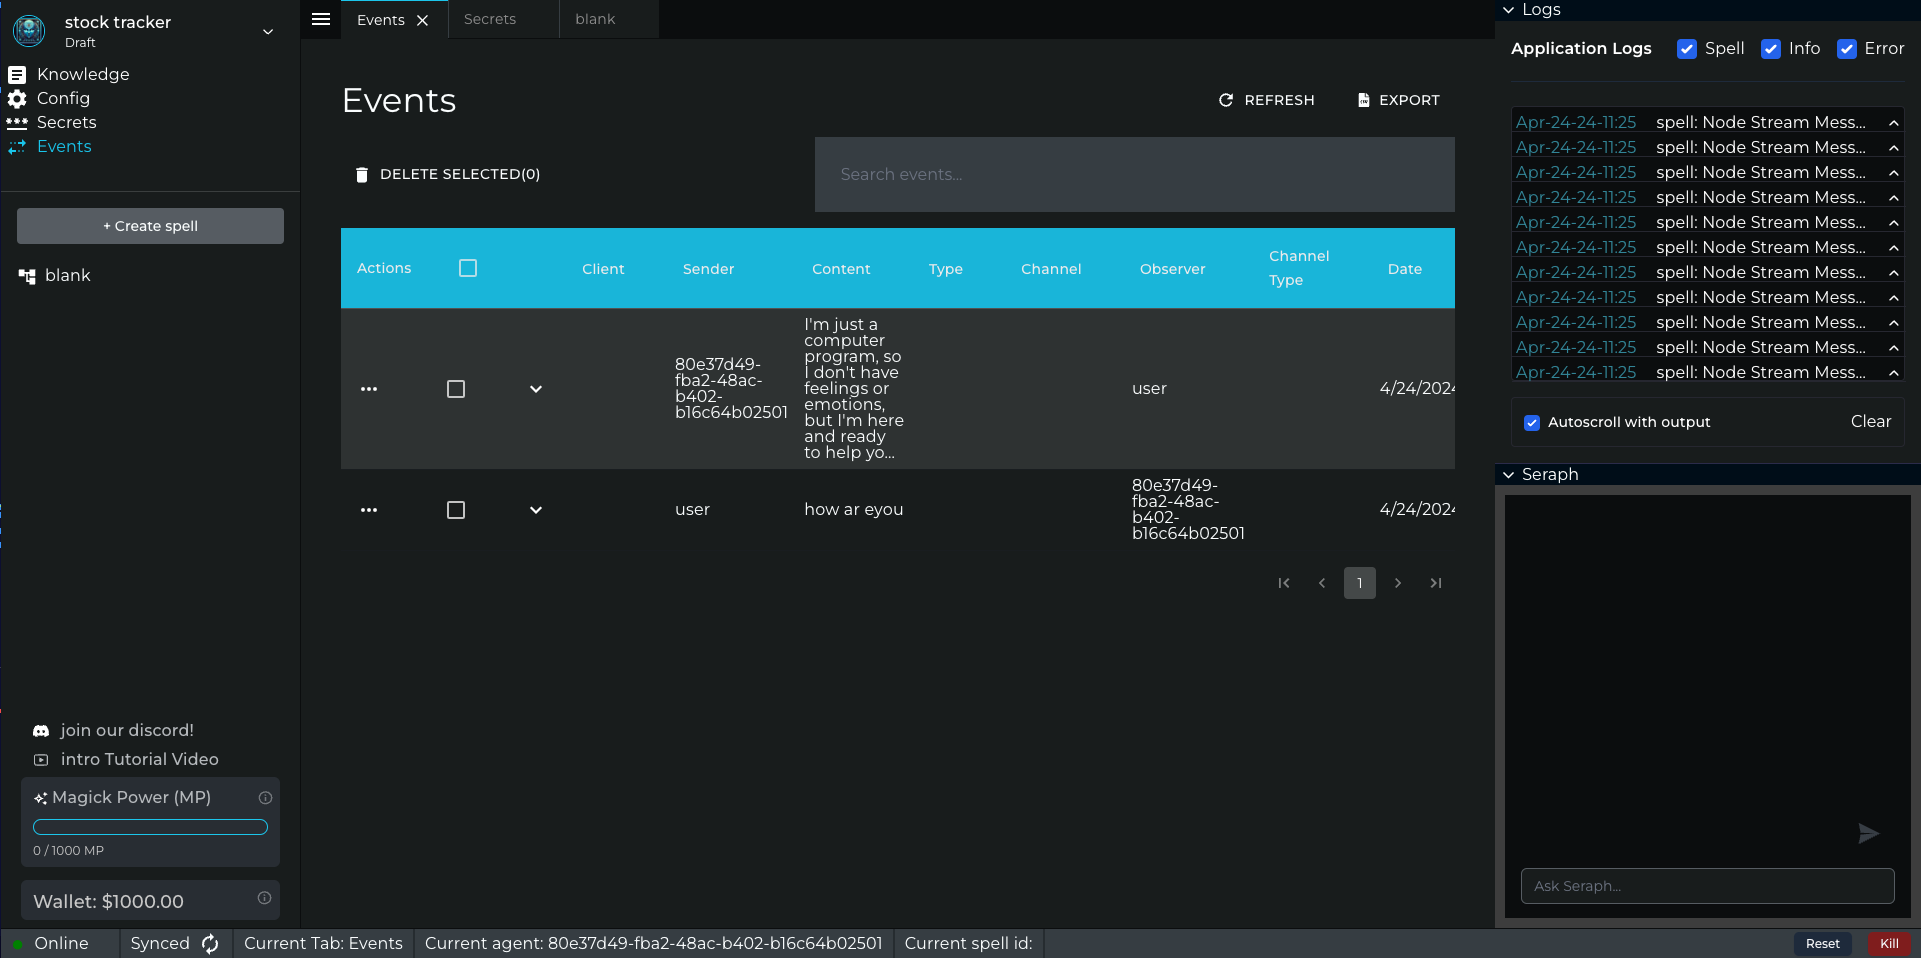
Events#
The Events tab allows you to view, delete or export a list of events that have been proessed by the Agent.
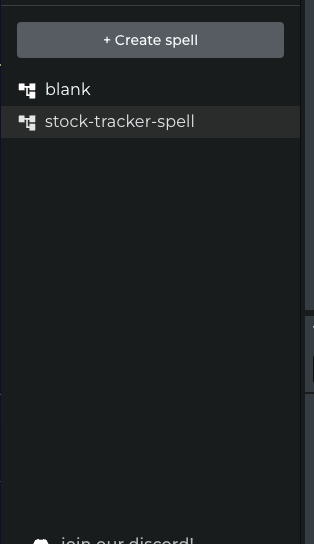
Spell List (3)#
The Spell List displays all the spells associated with the currently selected agent. You can create and open your spells from this section. Each spell represents a distinct logic flow or behavior for your agent.
Quick links (4)#
Here you can find links to the intro tutorial and our Discord
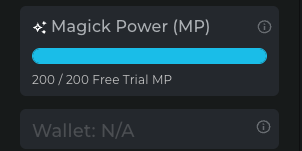
MP Bar (5)#
This is where you can see your Magick Points (MP) balance. Magick Points are used to run your agents and access various features within the platform. MP refills each month for those with a Wizard teir subscription. Here you can also see your wallet balance which you can top up with your Wizard subscription. As you run your spell you will see the MP balance decrease first and when empty the wallet balance will decrease.
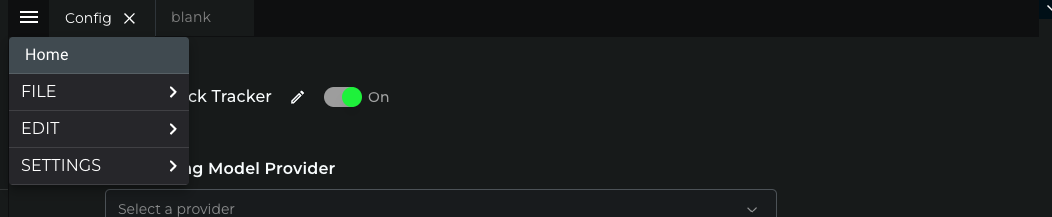
Tab Bar (6)#
The Tab Bar shows the currently open tabs within the AIDE, including the Spell Editor, Knowledge, Config, Secrets, and Events tabs. You can switch between these tabs to access different functionalities and settings for your agent. You can also open the file menu where you can create, edit, undo, redo, import, export spell..
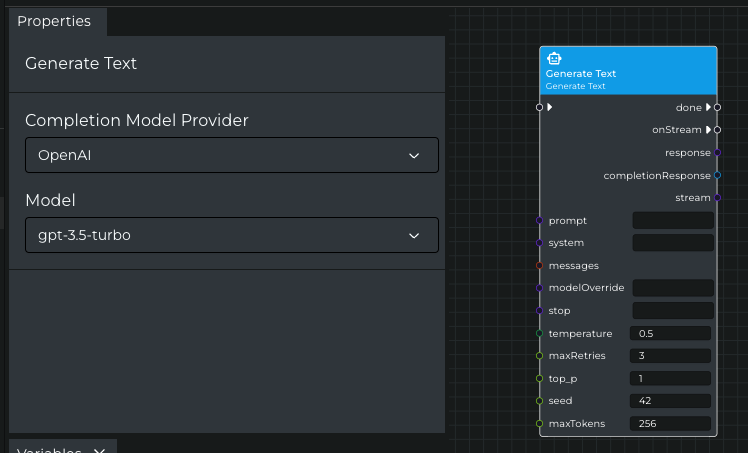
Properties Panel (7)#
When you select a node in the Spell Editor, the Properties Panel on the right side displays the configurable properties and settings for that node. It allows you to fine-tune the behavior and parameters of individual nodes in your spell.
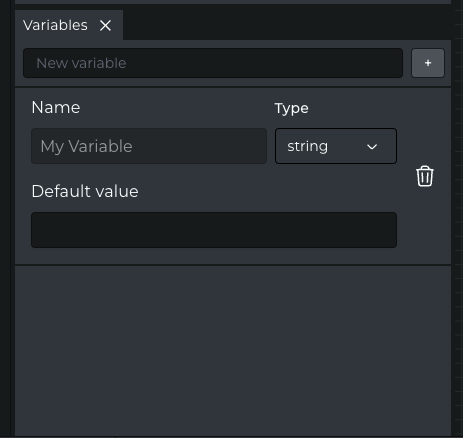
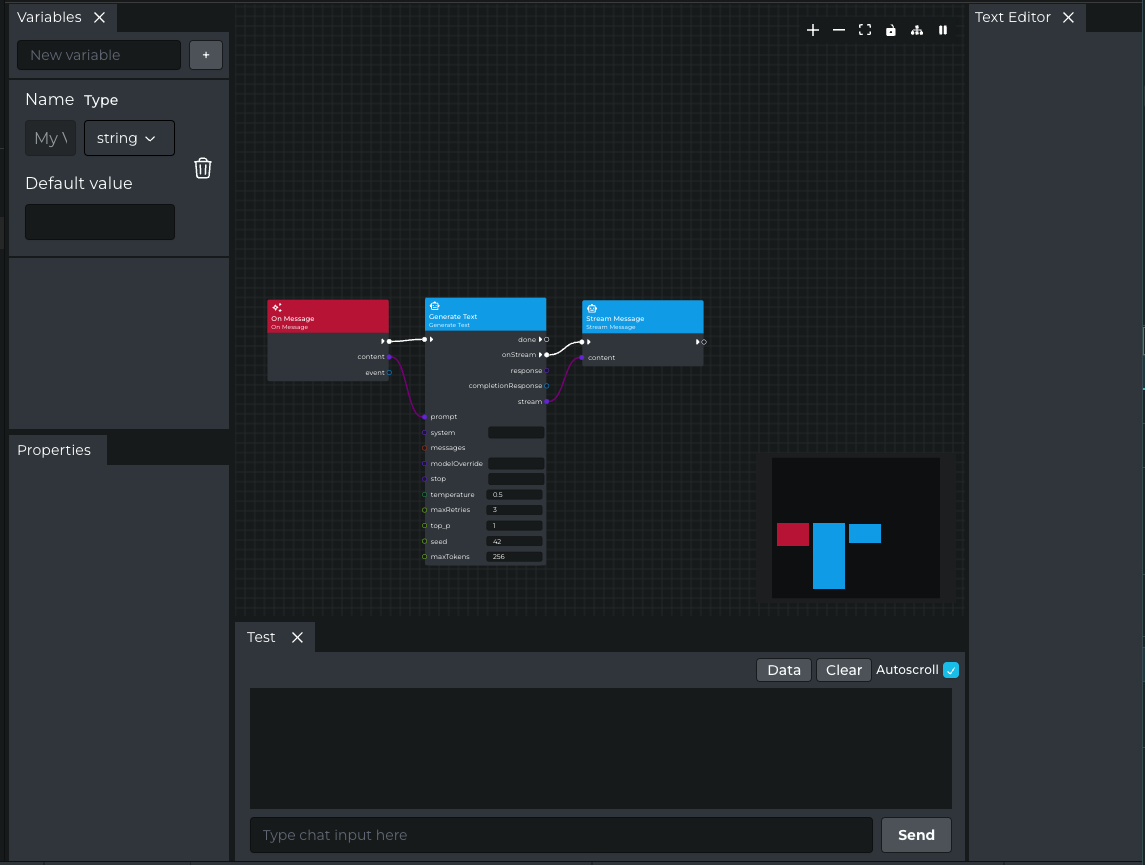
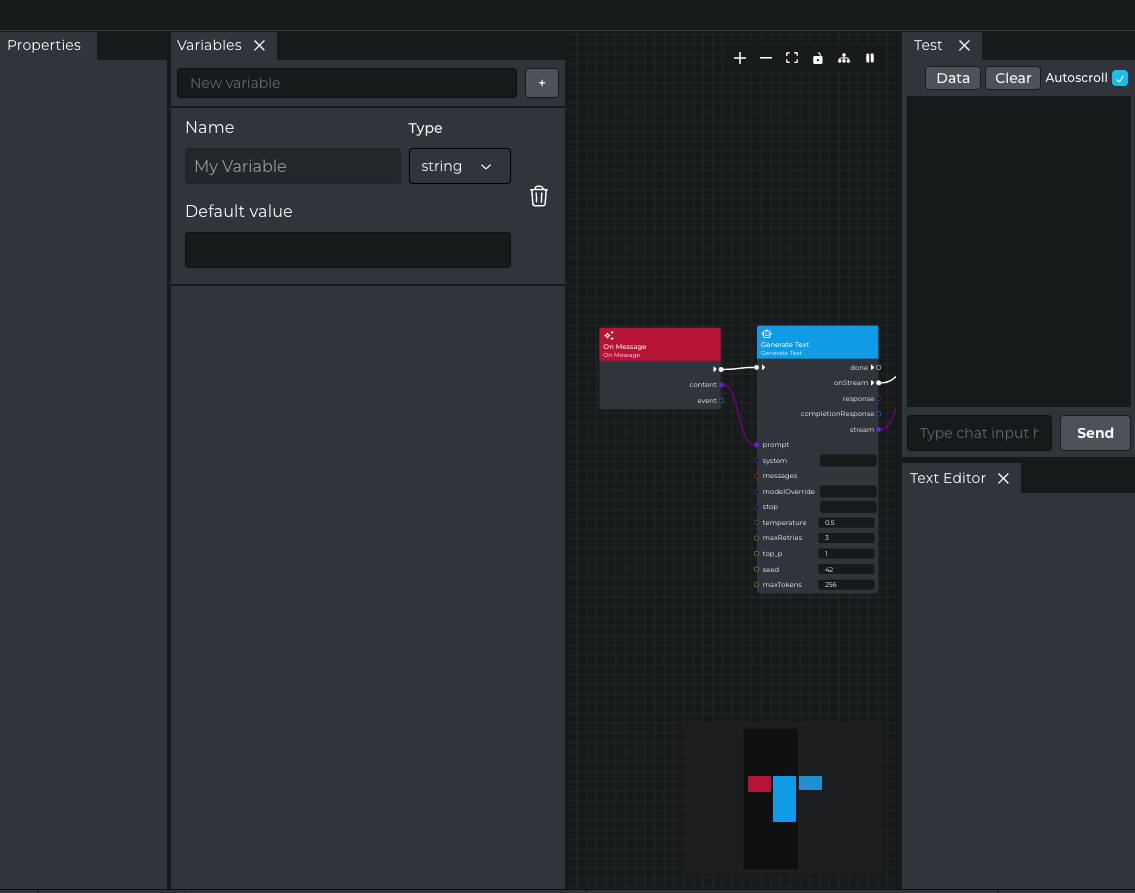
Variables Panel (8)#
The Variables Panel provides an overview of the variables used in your spell, including their names, types, and values. You can manage and manipulate variables here, making it easier to track and control the data flow within your agent.
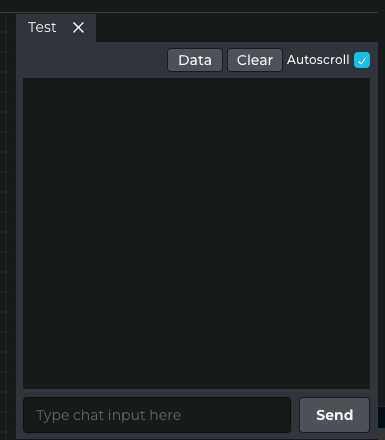
Play Test Panel (9)#
The Play Test Panel allows you to test your agent's behavior in real-time by interacting with it through a chat-like interface. You can send messages, trigger flows, and observe how your agent responds to different inputs. This panel is useful for debugging and refining your agent's abilities.
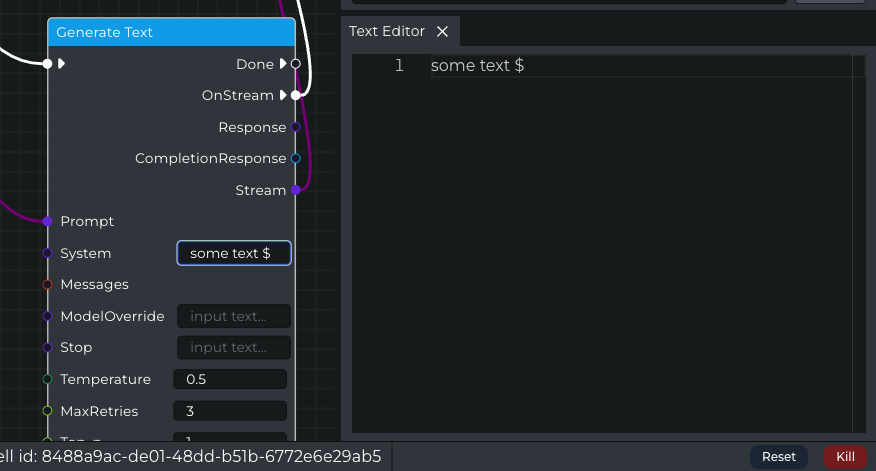
Text Editor Panel (10)#
This panel will activate when you click on a node or input within a node that is a text input. This makes it easier to edit larger blocks of text.
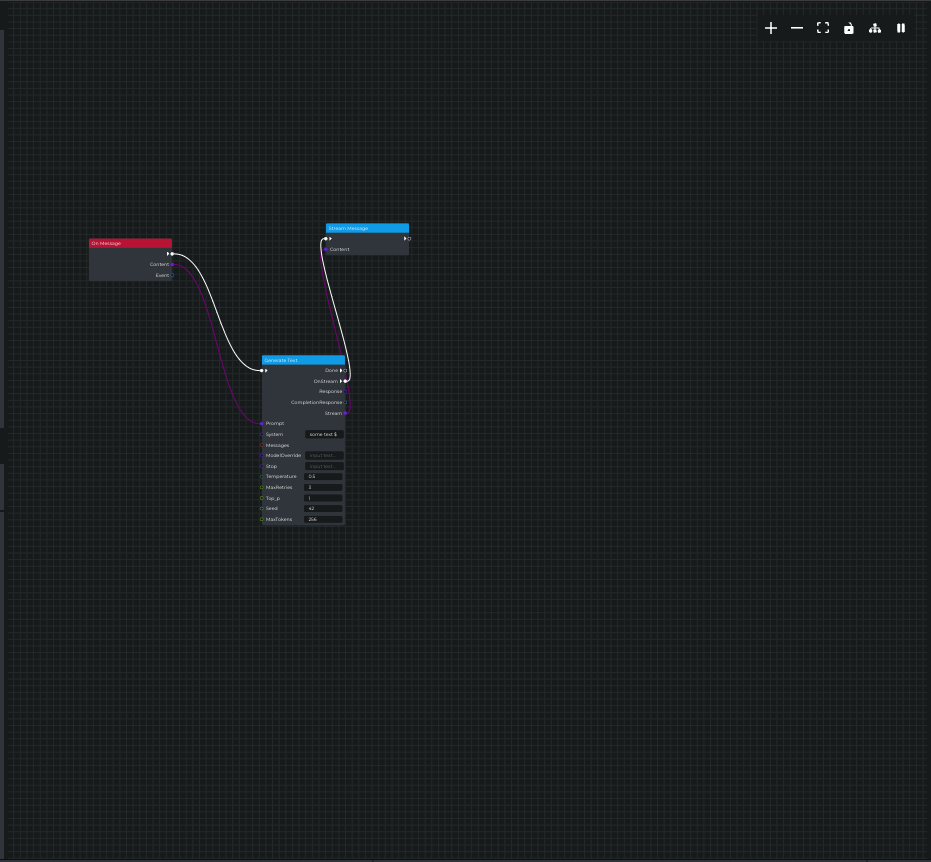
Editor Window (11)#
This is the main area where you visually construct your agent's logic using nodes and connections. The Editor Window provides a canvas for arranging nodes, connecting them to define the flow of your agent, and building complex behaviors through a drag-and-drop interface.
Panel Layout#
You can drag the panels around to customize the layout of the AIDE to suit your workflow. This flexibility allows you to focus on the areas that are most relevant to your current task.
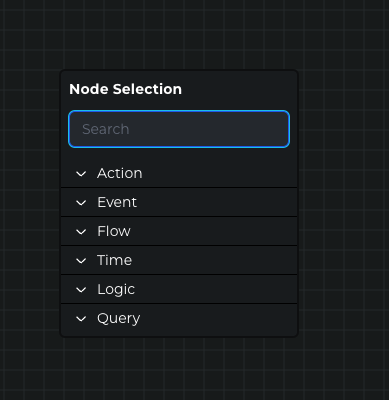
Node Picker#
The Node Picker opens up when you right-click on the editor canvas, allowing you to search for and add nodes to your spell quickly. It provides a convenient way to access the full range of available nodes and actions.
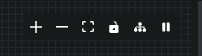
Toolbar (12)#
The toopbar gives you some convenient helpers to manage the execution of you spell along with some graph manipulation tools.
- Zoom in the graph
- Zoom out the graph
- Center the graph
- lock editing of the graph
- toggle the minimap
- Pause the execution of the Spell
Minimap (13)#
The minimap in the bottom-right corner provides a bird's-eye view of your spell, helping you navigate large or complex node graphs easily.

Node (14)#
The nodes are the building blocks of your agent's logic. Each node represents a specific action, decision, or data transformation within your spell. You can connect nodes together to create a flow of operations that define your agent's behavior.
Output Sockets (15)#
Output sockets are the connection points on nodes where data or control flow is passed to subsequent nodes. By linking output sockets to input sockets, you define the sequence of operations and data flow within your agent.
Input Sockets (16)#
Input sockets are the connection points on nodes where data or control flow is received from preceding nodes. By linking input sockets to output sockets, you establish the flow of information and actions within your agent.
Logs Panel (17)#
The Logs Panel displays relevant logs, errors, and debugging information generated during the execution of your agent. It helps you monitor the behavior of your agent, identify issues, and track the flow of data through the spell.
Agent Status Bar (18)#
The Agent Status Bar at the bottom of the AIDE provides information about the current agents ide session. Here you can see:
- The connection status of the AIDE with your running agent.
- When your Agent is syncing with the server.
- Current Tab
- Current Agent ID
- Current Spell ID
